
Hand lay-up is the most classic and widely used process for fiberglass reinforced plastic (FRP), relying on manual laying at room temperature and pressure without requiring large equipment. It is widely used in anti-corrosion equipment, boats, shells, molds, landscape products, etc. Although the process threshold seems low, the details of each step directly affect the strength, appearance, and aging resistance of the product. This article provides a complete breakdown of the entire process of hand lay-up of FRP according to actual factory specifications.
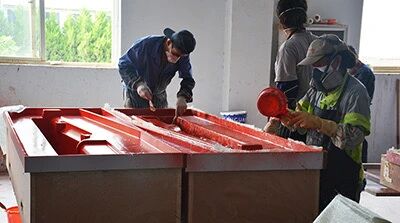
preliminary preparation
- Environmental conditions
The recommended temperature for the operation workshop is 15-30℃, with a relative humidity of ≤75%. Operations should be avoided in rainy and high-humidity environments, as high humidity can lead to defects such as sticky surfaces and incomplete curing. Dust prevention measures should be taken in the operation area to prevent dust from falling on the uncured resin surface. Adequate ventilation should be provided, and operators should wear goggles, solvent-resistant gloves, and protective masks. - Inventory of raw materials and tools
- Resin: unsaturated polyester resin / vinyl resin / epoxy resin, selected according to the operating conditions of the product; supporting curing agent, accelerator (polyester system); polyester resin: first add the accelerator and stir evenly, then add the curing agent before paste preparation. It is strictly prohibited to mix the curing agent and accelerator directly to prevent explosive polymerization.
- Reinforcement materials: surface mat, chopped strand mat, and glass fiber woven roving, which should be cut in advance according to the product size; small pieces should be cut from corners and arc areas for later use; the cloth should be well protected from moisture, as damp fibers can cause delamination, white spots, and dry patches in the later stages.
- Auxiliary materials: gel coat resin, release agent/release wax, color paste;
- Tools: brush, wool roller, defoaming roller (aluminum alloy/plastic roller), scraper, stirring cup, stirring rod, electronic scale, scissors.
- Mold inspection and pre-treatment
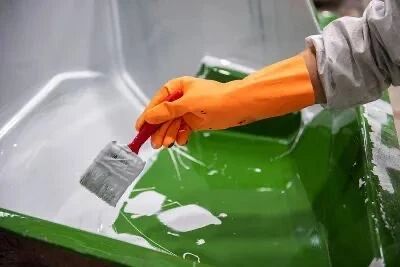
Construction of rubber coating layer
The adhesive layer determines the surface appearance, weather resistance, and corrosion resistance of the product. The standard thickness of the adhesive layer is 0.3-0.5mm. If it is too thin, there is insufficient protection, and if it is too thick, it is easy to crack.
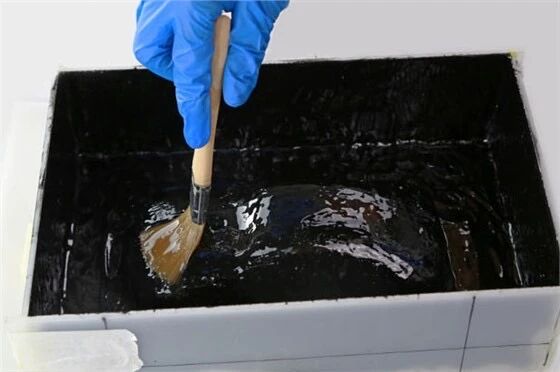
Preparation of resin adhesive solution
- Use an electronic scale for weighing, strictly follow the resin manufacturer’s ratio, and prohibit estimating volume based on experience;
- Polyester resin: resin → accelerator, thoroughly stir and mix; Before preparing to lay the paste, add the curing agent and stir thoroughly again;
- The amount of glue should be controlled according to the time of gel. Do not mix too much at one time to prevent the gel from being scrapped before the resin has been pasted; Reduce the proportion of curing agent added appropriately in high temperature environments;
- Stir as gently as possible to reduce the introduction of bubbles; Prepare the adhesive solution and use it as soon as possible.
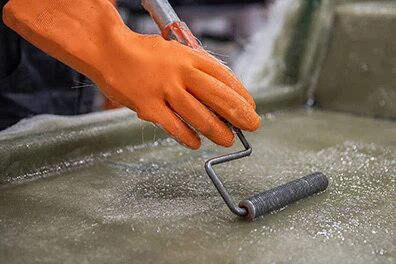
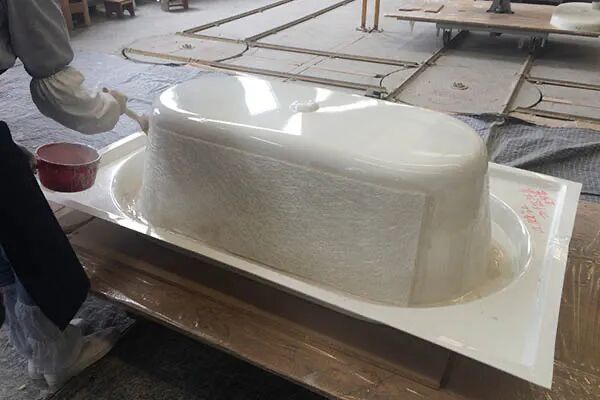
Hand laid layer by layer (core process)
Principle: One cloth, one paste. It is forbidden to stack multiple layers of dry cloth at once and then pour resin. Each layer must be fully impregnated with fibers and fully defoamed.
- Brush a thin layer of prepared resin on the surface of the mold for adhesive coating drying;
- Lay the first layer of reinforcement material, prioritize the surface felt, naturally spread the felt flat and fit the mold surface, do not pull the fibers forcefully, as pulling will cause fiber prestress and deformation in the later stage; Cut small openings in the material at the curved and corner positions, eliminate wrinkles, and allow the material to fully adhere to the mold;
- Drizzle/brush resin on the surface of the fiber material to allow the resin to naturally infiltrate the fibers;
- Use a defoaming roller to roll from the middle to the periphery, driving out all bubbles between the fabric layer and the mold, as well as inside the fabric layer; Only when the fabric becomes completely translucent without any white or dry spots, can it be considered qualified for infiltration; White dry spots indicate that the fibers have not been impregnated with glue, and in the later stage, they are weak points and channels for water infiltration;
- Misalignment of layer joints: For the splicing joints of the checkered fabric, the joints of the upper and lower layers cannot overlap and should be staggered by 5-8cm; add felt/layout reinforcement to corners and stress areas;
- Interlayer timing: “wet to wet” paving is adopted, the upper layer is still sticky and not fully hardened by gel, and the next layer is paved to ensure interlayer bonding;
⚠️ If the interval time is too long and the previous layer has completely solidified and hardened, the next layer cannot be directly laid; It is necessary to polish and dust the cured surface before brushing the resin, otherwise interlayer delamination and cracking are prone to occur. - Repeat the process of applying adhesive, laying fibers, soaking, and rolling bubbles until the total thickness specified in the drawing is reached.
- Local reinforcement: additional layers are added to the support, lifting ears, and corner stress positions to create a reinforcement zone.
Curing stage
After all the pasting is completed, the product should be left in the mold to solidify and the environment should be dust-proof. Do not move or shake the mold.
- Room temperature curing: polyester system, room temperature 20 ℃, continue to cure after gel; Initial demolding strength, generally 12-24 hours at room temperature;
- Post curing (anti-corrosion and structural components with high performance requirements): After curing at room temperature, heating can be used for post curing; Gradually increase the temperature, prohibit rapid high temperature, prevent excessive internal stress, product deformation, and cracking;
- Determine demolding conditions: The overall hardness of the product, no soft elasticity when pressed, and a crisp sound when struck at the edges; If there is partial softening, it indicates insufficient curing. Early demolding is strictly prohibited as it may cause deformation and collapse.
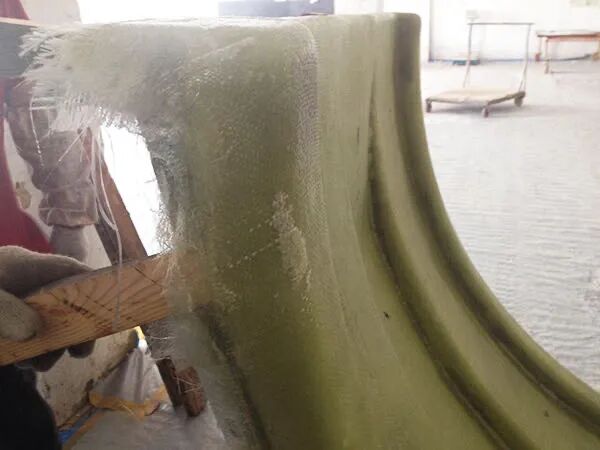
Demoulding operation - Use a demoulding pry bar and rubber hammer, apply external force evenly, and gradually separate along the edge of the product. Do not forcefully pry at a single point to prevent cracking and edge breakage of the product;
- For large shell products, apply uniform force at multiple points to avoid local stress;
- After demolding and removing the product, place it on a shaping bracket and continue to solidify after completion. Free placement can easily cause deformation.
Post processing and inspection
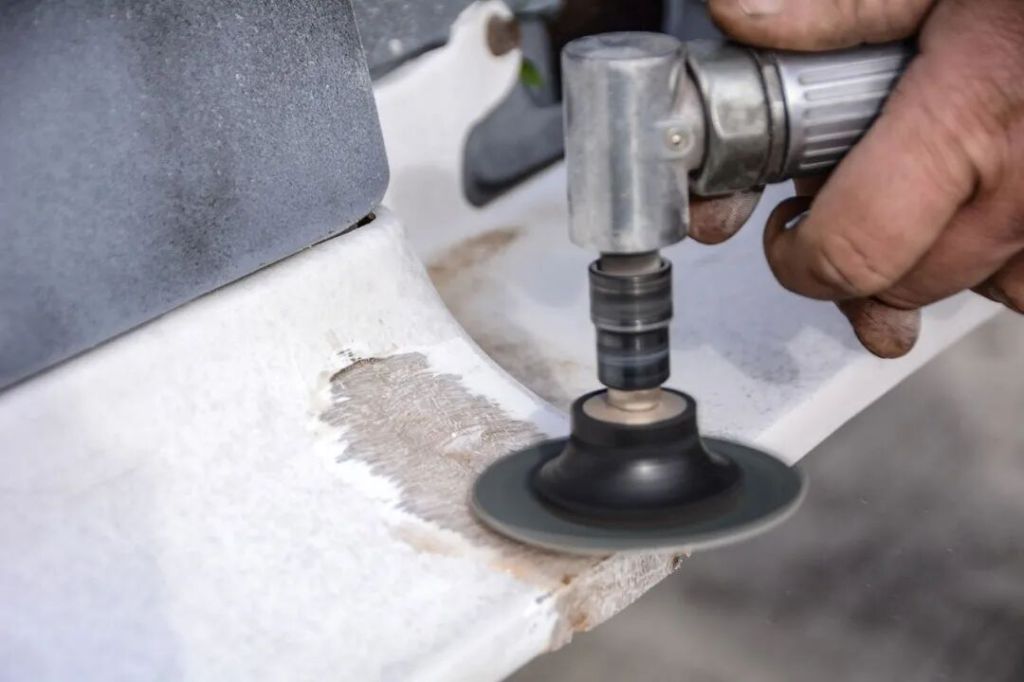
- Edge trimming: Polish and cut excess burrs and flying edges; Polish burrs, bubbles and pits; Apply putty to repair the defect and polish it flat again;
- Surface treatment: can be polished and polished, and coated with protective paint;
- Finished product inspection:
Appearance: No large areas of bubbles, pinholes, wrinkles, or dry white spots;
Interlayer: The knocking sound is uniform, without any hollow or abnormal noise;
- Size: Check the shape and thickness;
- Working condition components: Conduct anti-seepage, leak testing, and other inspections according to project requirements.
Common Misconceptions in Craftsmanship Tips
- Increase the curing agent more quickly: the gel is too fast to soak and defoaming, there are a lot of bubbles inside, the exothermic is too high, the internal stress of the product is large, and later cracking occurs; Adding less will result in poor long-term curing and surface stickiness; Must be weighed and proportioned.
- Laying multiple layers of fabric at once: resin cannot penetrate into the middle of the interlayer, resulting in a large number of internal dry areas and a significant decrease in product strength.
- If the adhesive coating is not dry enough, immediately apply the cloth: the adhesive coating is wrinkled, orange peel, and the appearance of the finished product is scrapped.
- After the interlayer is completely cured, the next layer is directly laid without polishing or dust removal: interlayer bonding fails, and later use of layered peeling.
- Forced construction on high humidity and rainy days: resin blocking, permanent sticking, and product scrapping.
The hand lay-up process may seem straightforward, but it’s the details that determine the lifespan of the product. From the selection of raw materials to the laying, curing, and post-treatment, every step directly affects the stability of the finished fiberglass product.

